Self-Service Tutorial
If you need further assistance, please contact our Admissions office using the live chat in the bottom right corner of the page, via phone at (919) 739-6720 and (919) 739-6719, or via email at wcc-admissions@waynecc.edu.
How to plan and register for courses in Self-Service
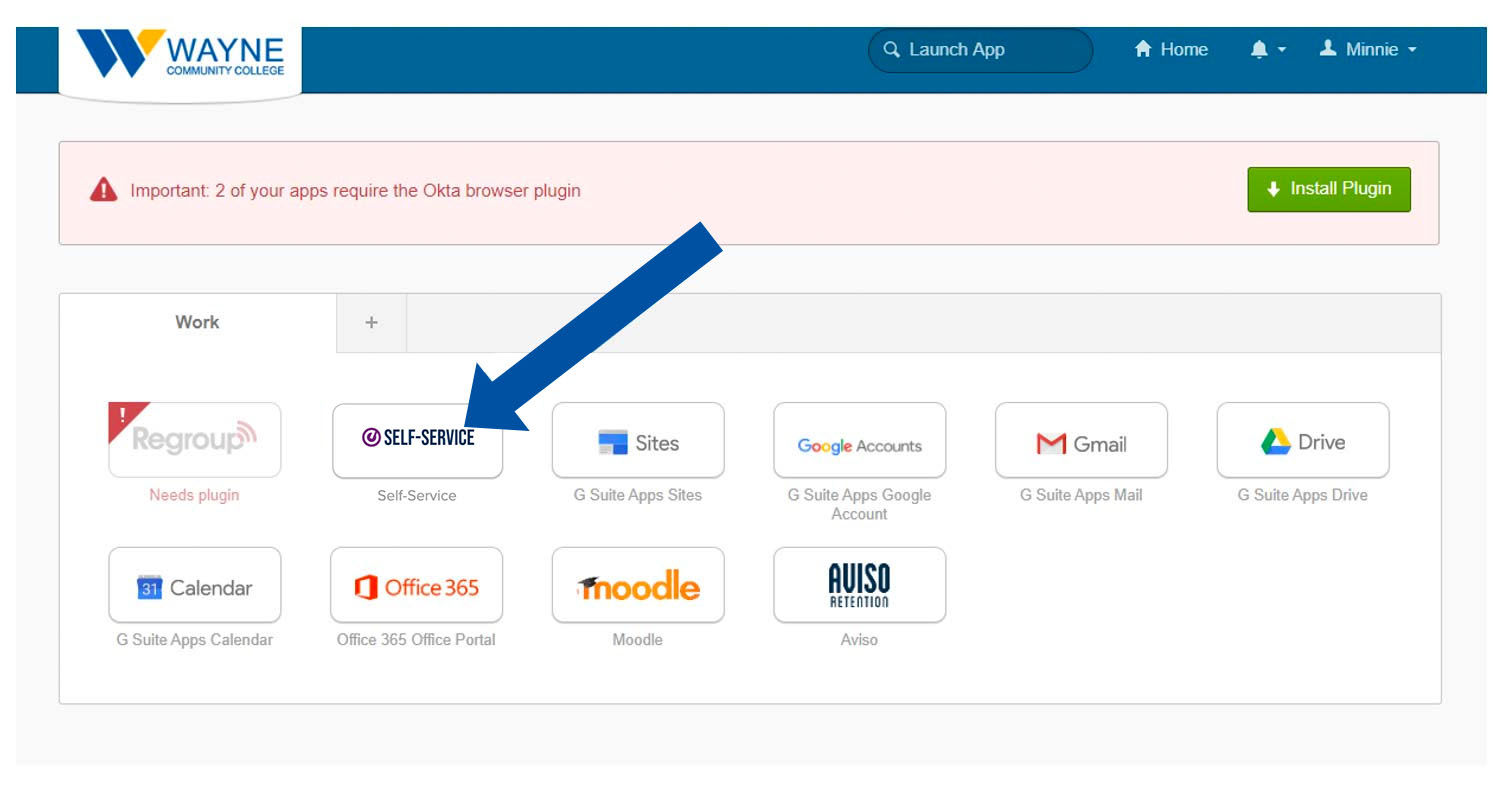
Step 1
Log in to the Okta Portal through My Bison ID and click the Self-Service box.
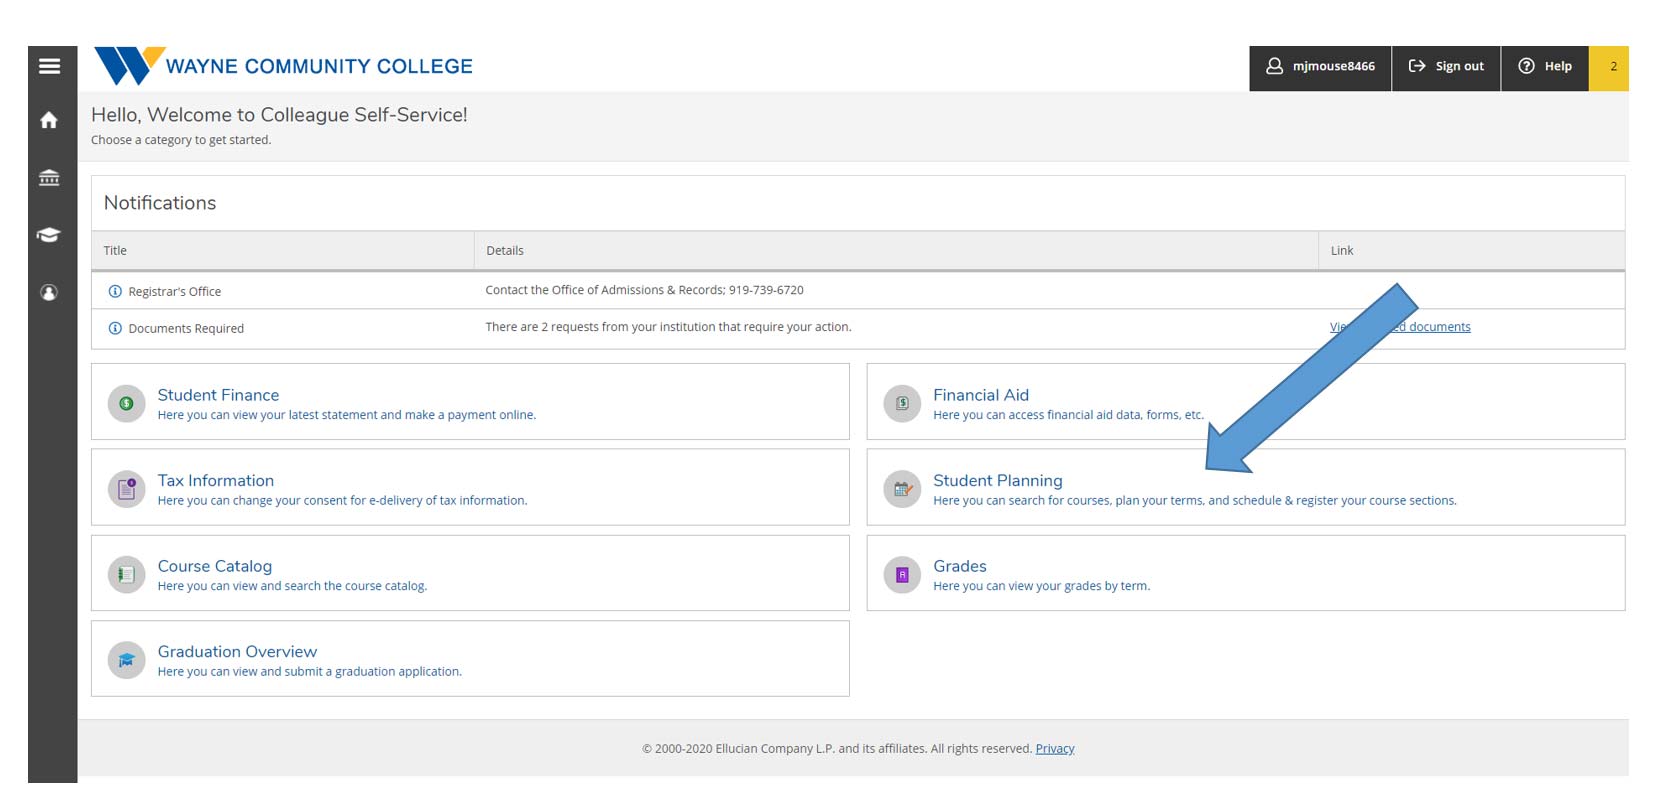
Step 2
Once in Self-Service, you have several options. Click “Student Planning.”
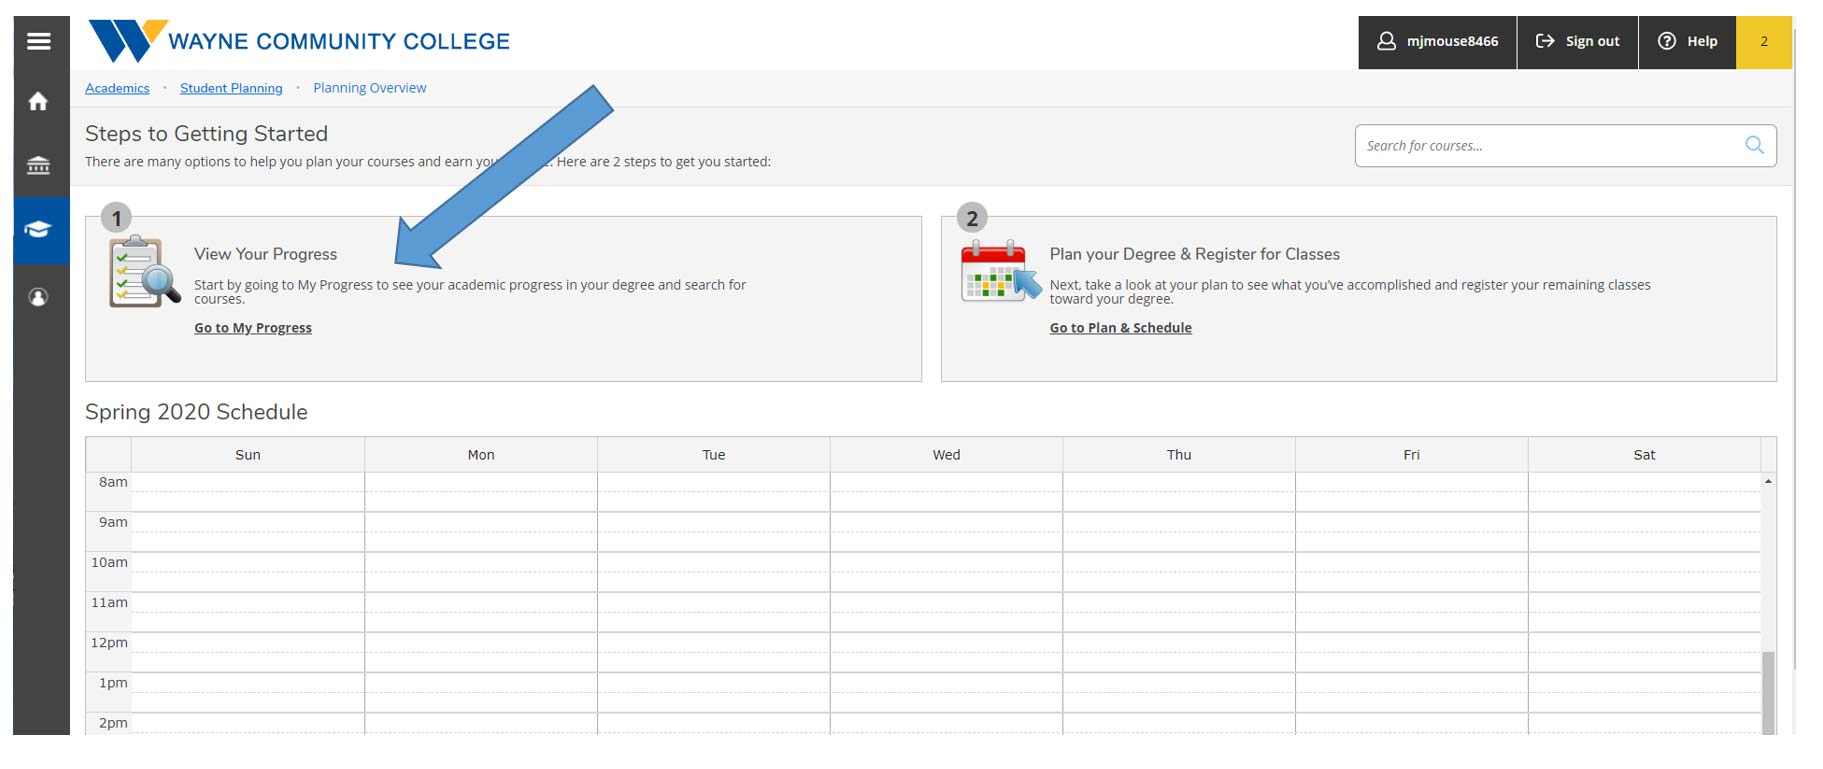
Step 3
Click option 1, “View Your Progress,” to view your academic progress in your degree, determine which courses are still remaining, and search for courses.
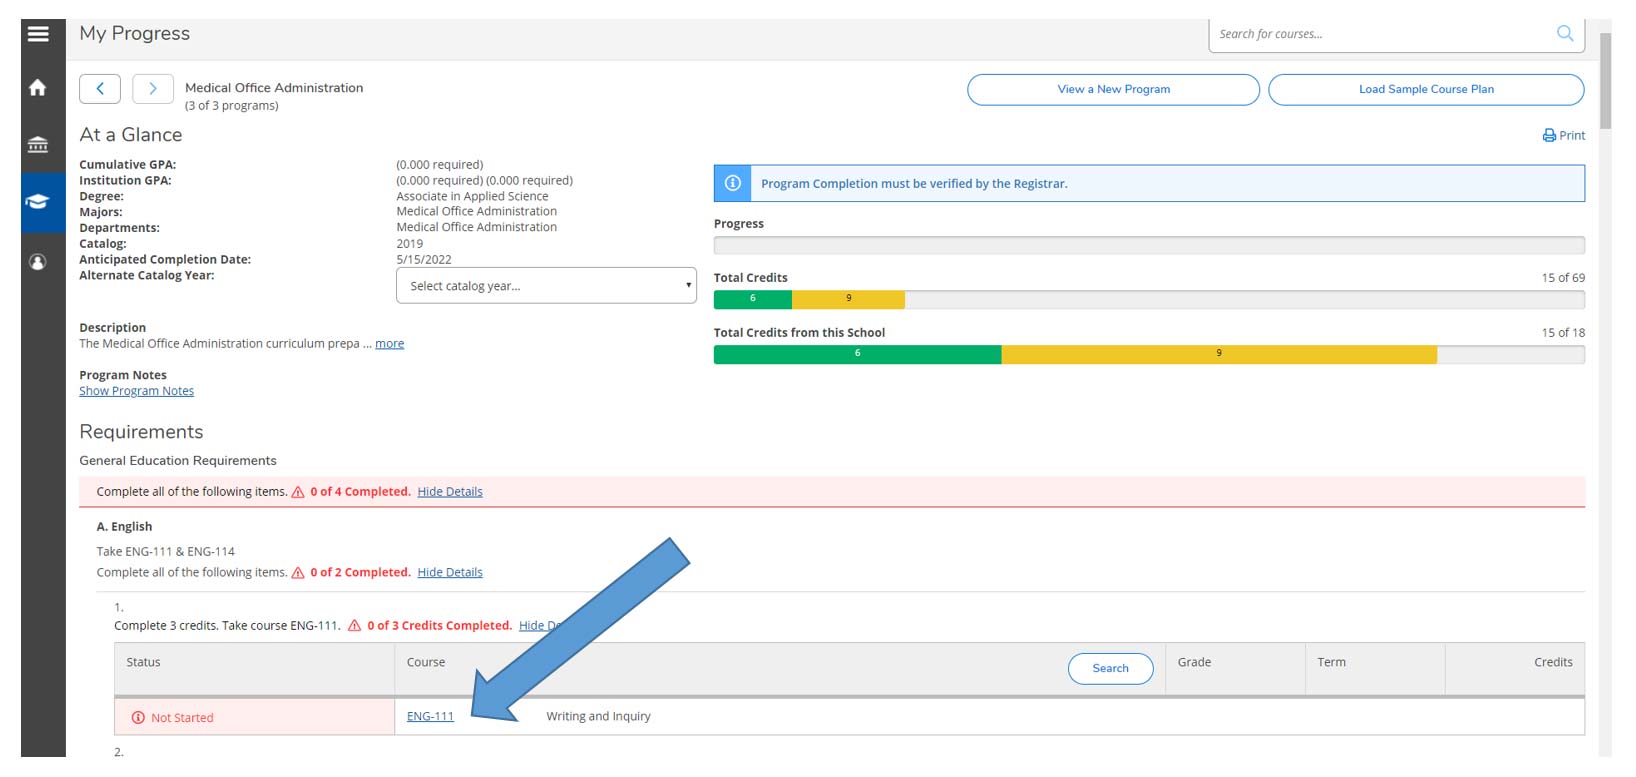
Step 4
View of program progress and requirements page. Click on each course that you would like to plan.
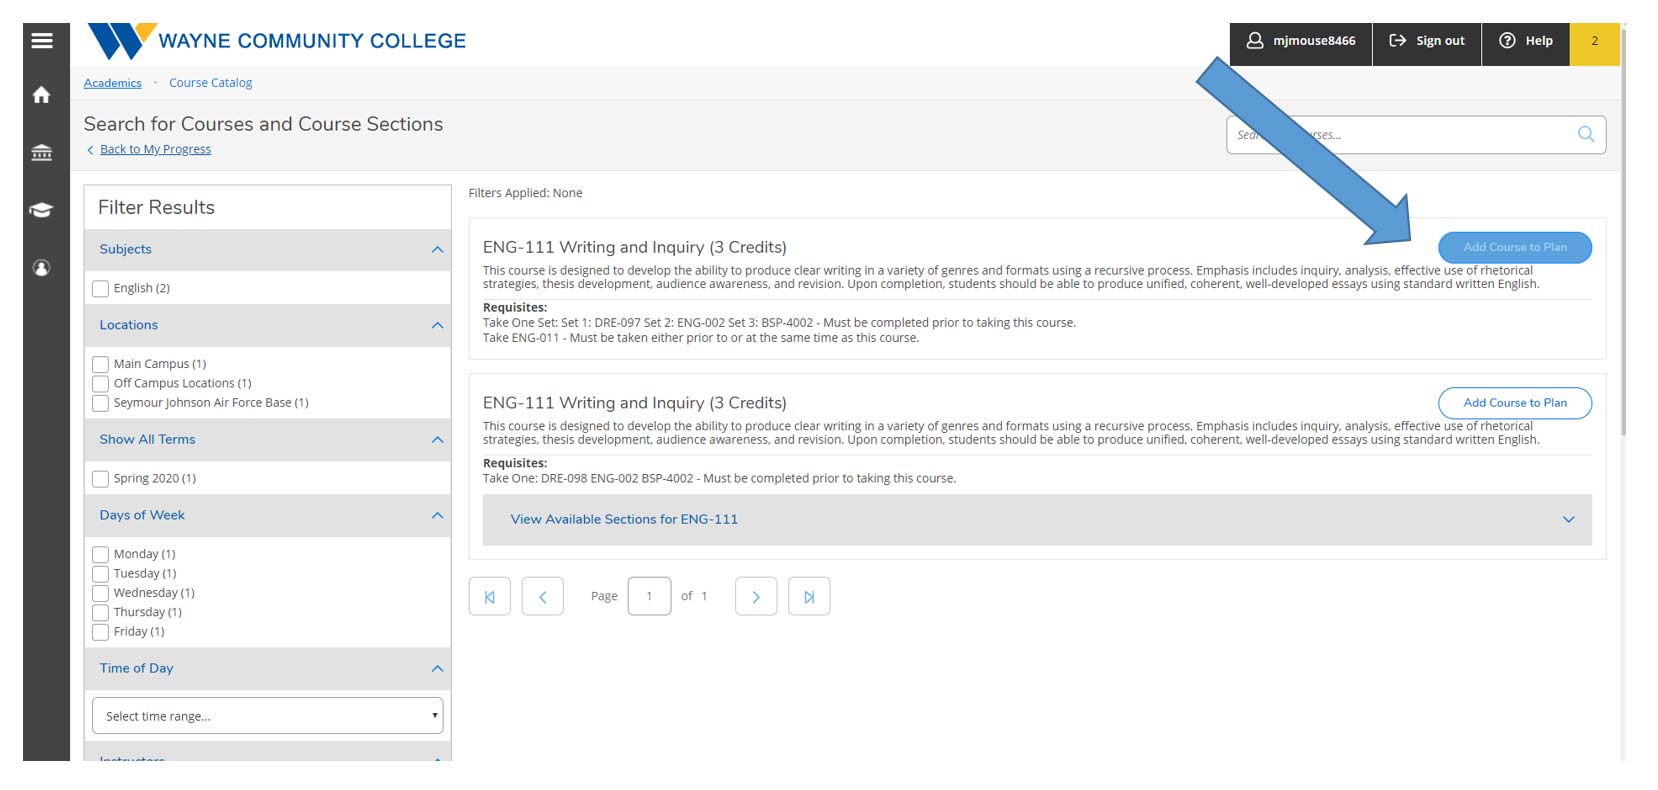
Step 5
Once course is selected, click to “Add Course to Plan.”
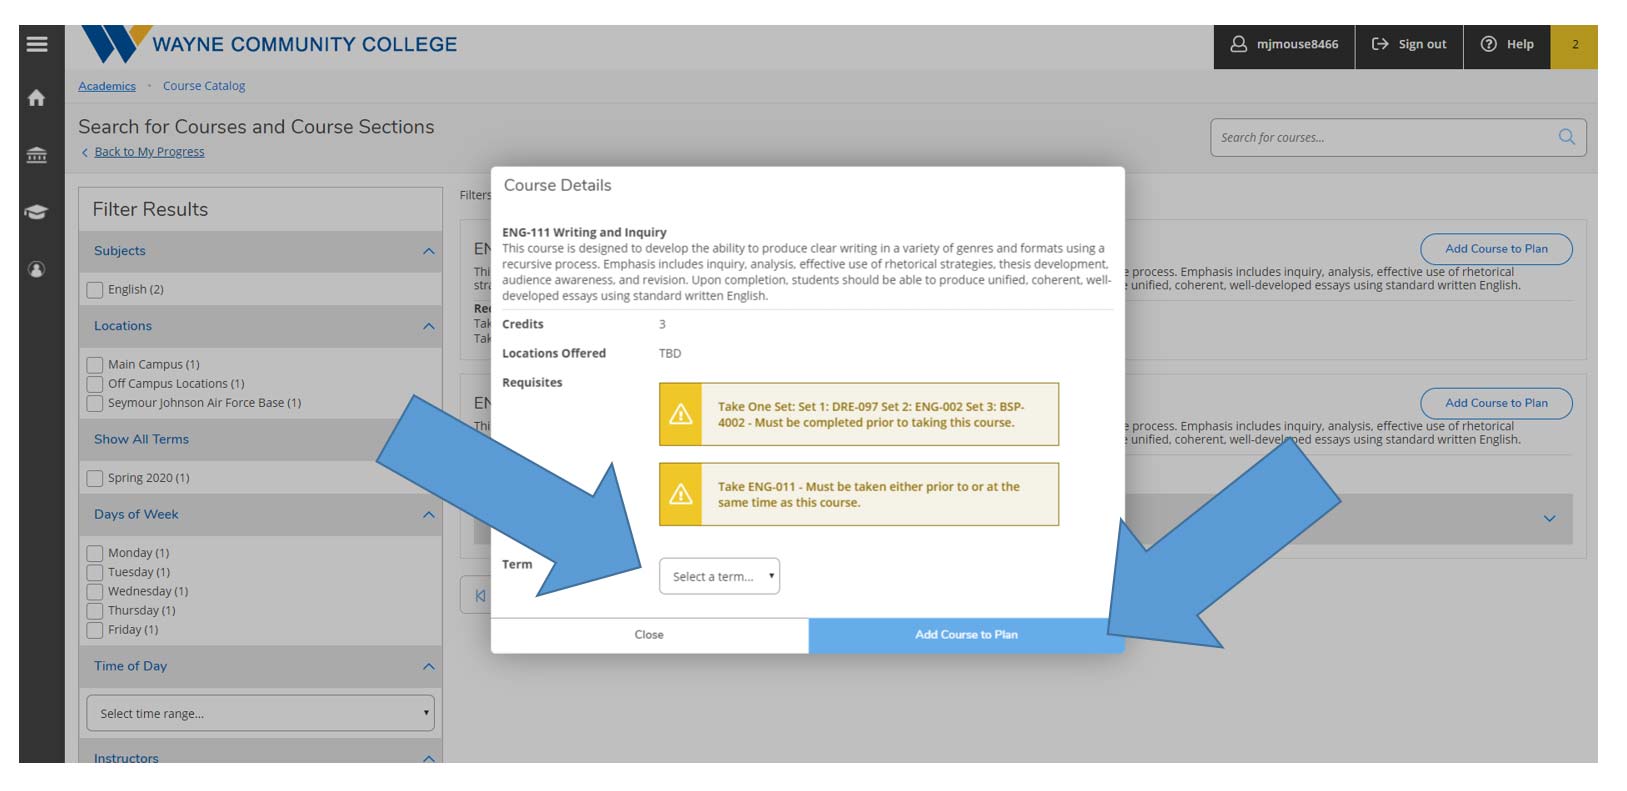
Step 6 and 7
You must “Select a term” that you intend to take the selected course. Then hit “Add Course to Plan.” This will add the course to your timeline.
Step 8
Repeat steps 4-7 until all remaining required courses have been added to your plan.
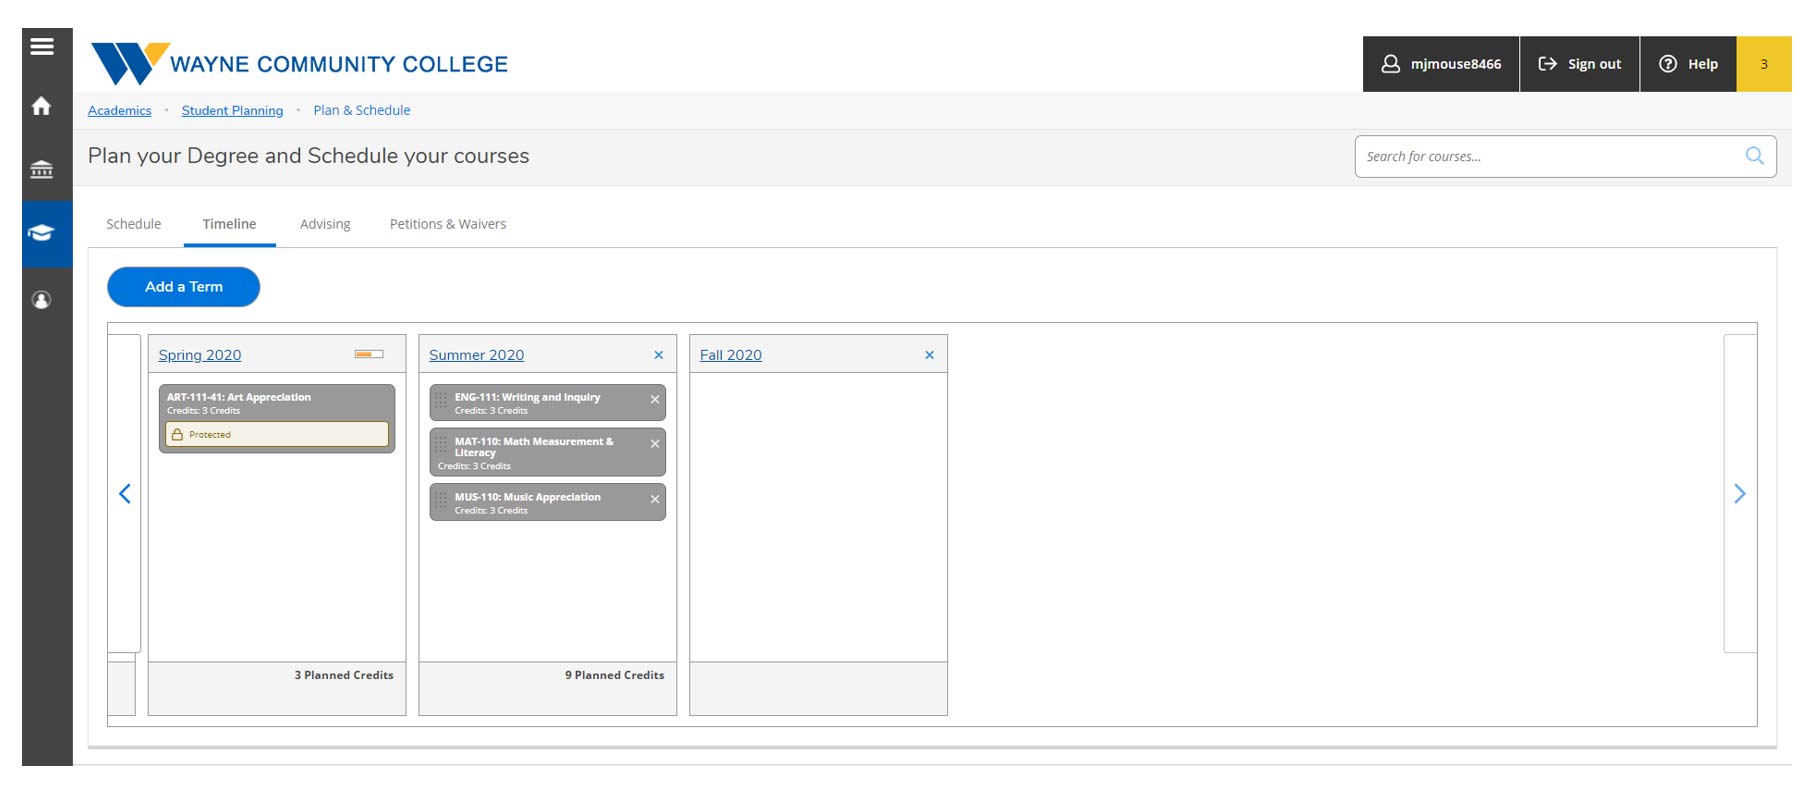
Step 9
Proceed to “Timeline” to review your courses. Your timeline can be viewed by selecting “Student Planning,” then “Plan and Schedule,” then “Timeline”.
Step 10
When your degree plan (planned courses) are ready for review by your academic advisor, click “Request Review.” This notifies your academic advisor that you are ready for them to review your plan. This does not mean that you are registered for classes.

Once your plan is approved by your advisor and your advising hold is removed, you will be eligible to register during priority registration.Please proceed to the next steps to determine how to plan a specific section of a course and register.
Step 11
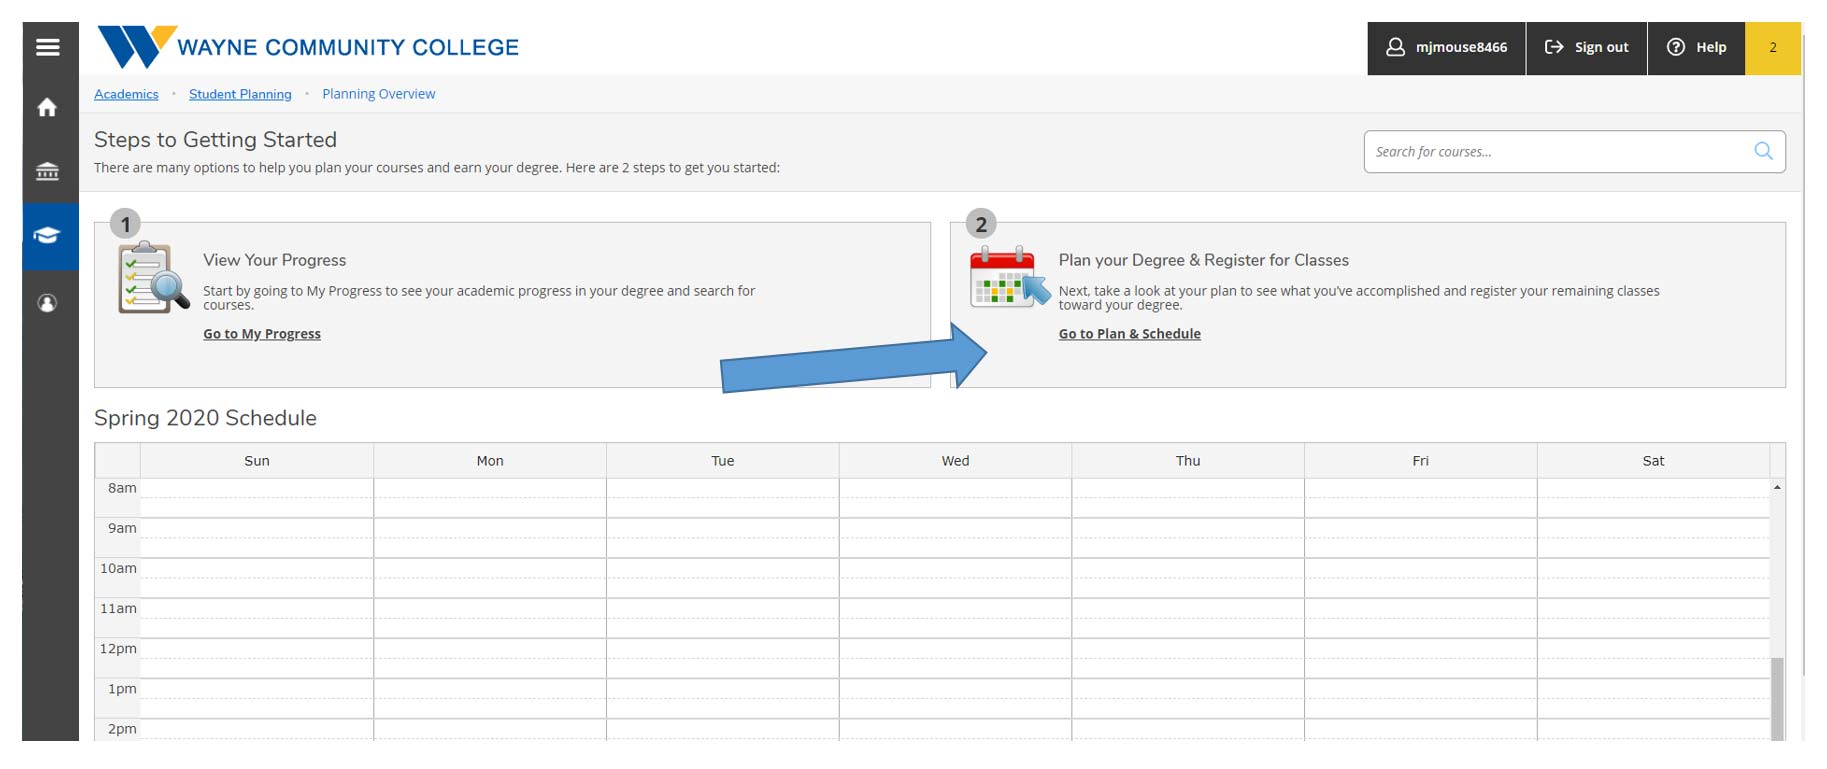
From the Student Planning overview screen, select option 2: “Plan and schedule.”
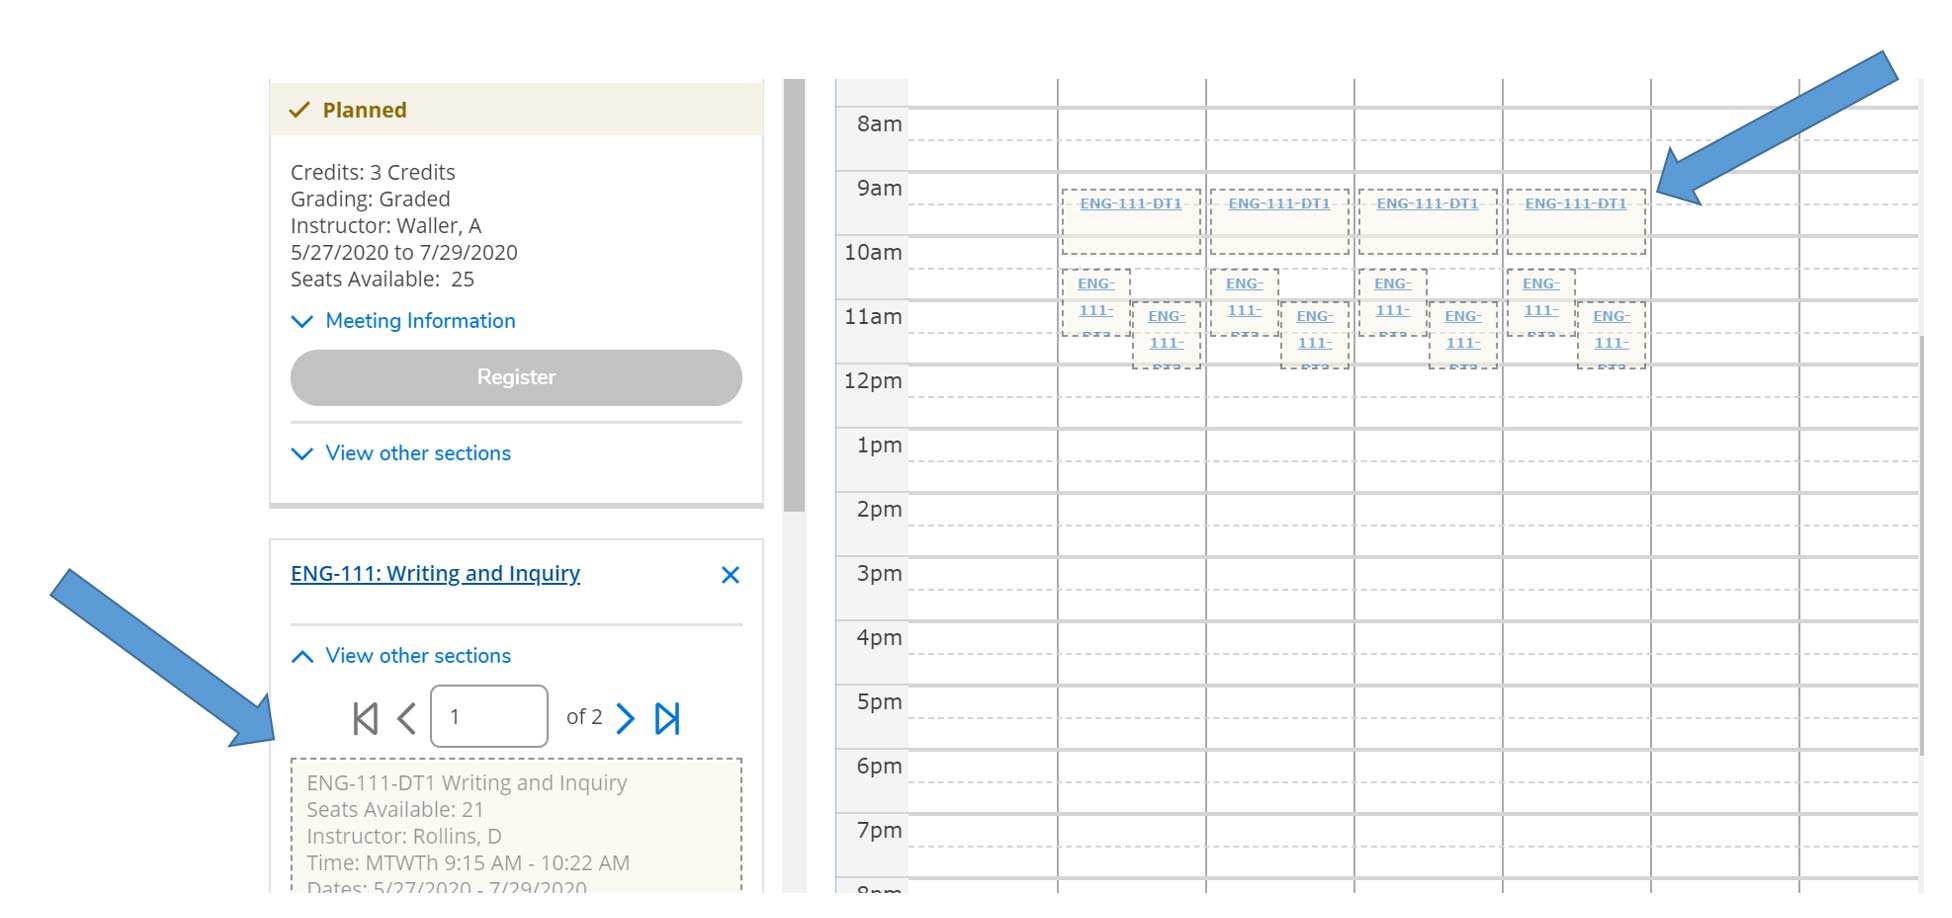
Step 12
View available course sections by clicking “View other sections.” Use the arrows under that link to see more options. Each section block lists the course date and time, available seats, and the instructor.

Step 13
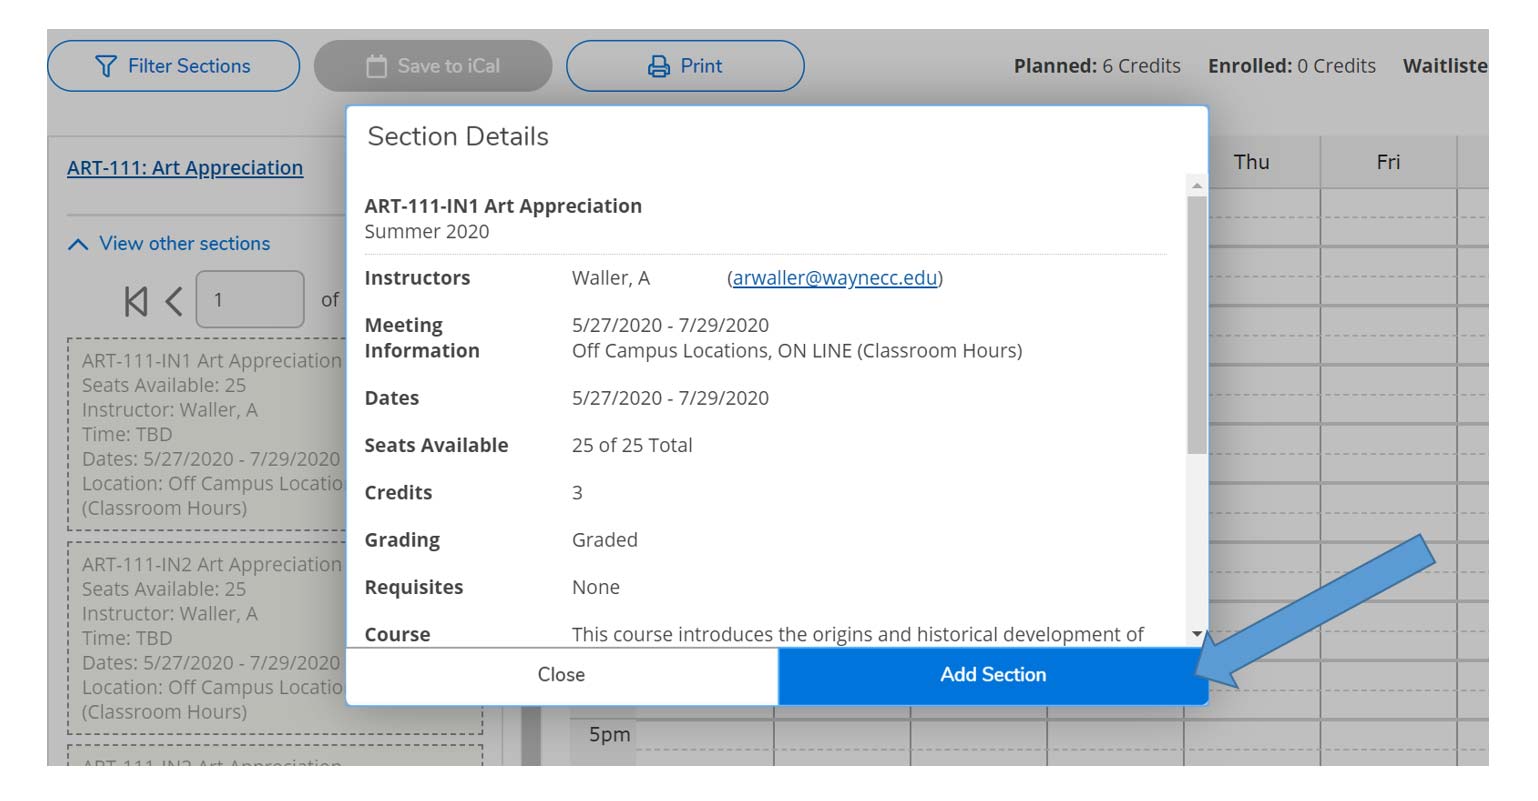
Once you find the section you wish to register for, you can click either the box in the section list (left side), or the calendar planner (right side).
Once you select the section, a pop-up box will open. Click “Add Section”
Step 14
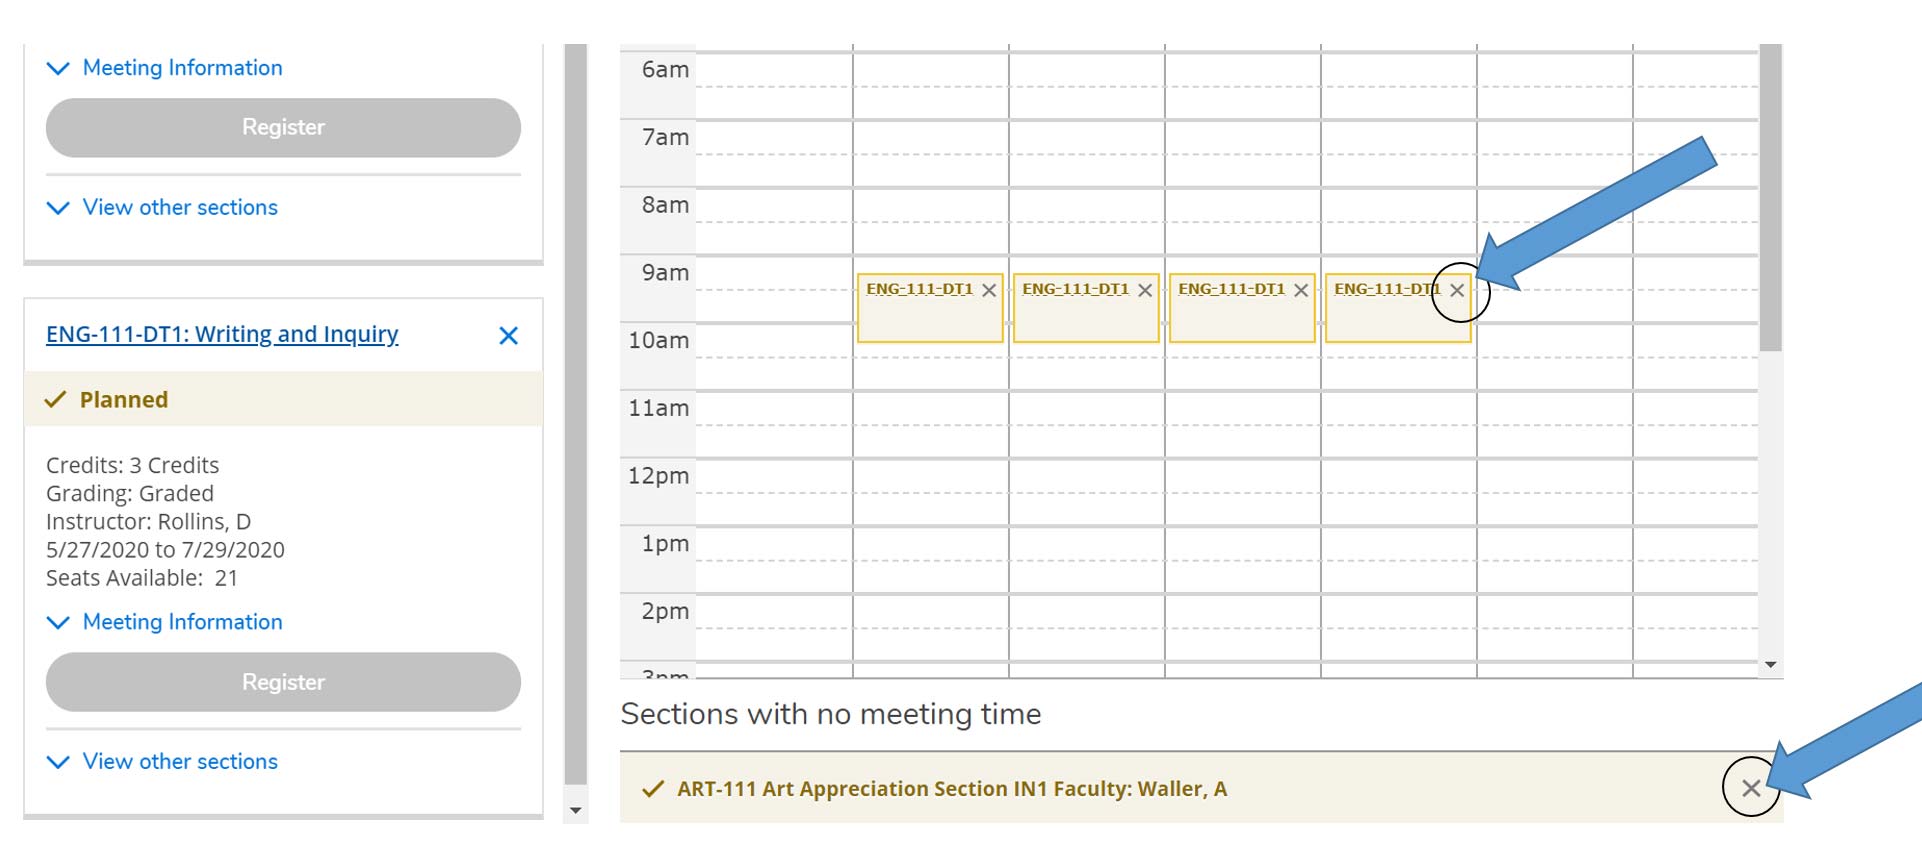
Once you add the section, that course will stay on your weekly calendar so you can continue to build your schedule. The planned/selected section will show up in YELLOW.

Step 15
Repeat steps 12-14 until you have a complete schedule. Choose the schedule that best fits your needs. You are almost finished, but you are not registered, yet!
Step 16
Once you have chosen a section for each class, review your schedule one last time. Online classes will be listed at the bottom. You can remove sections by clicking the circled X in each section box.
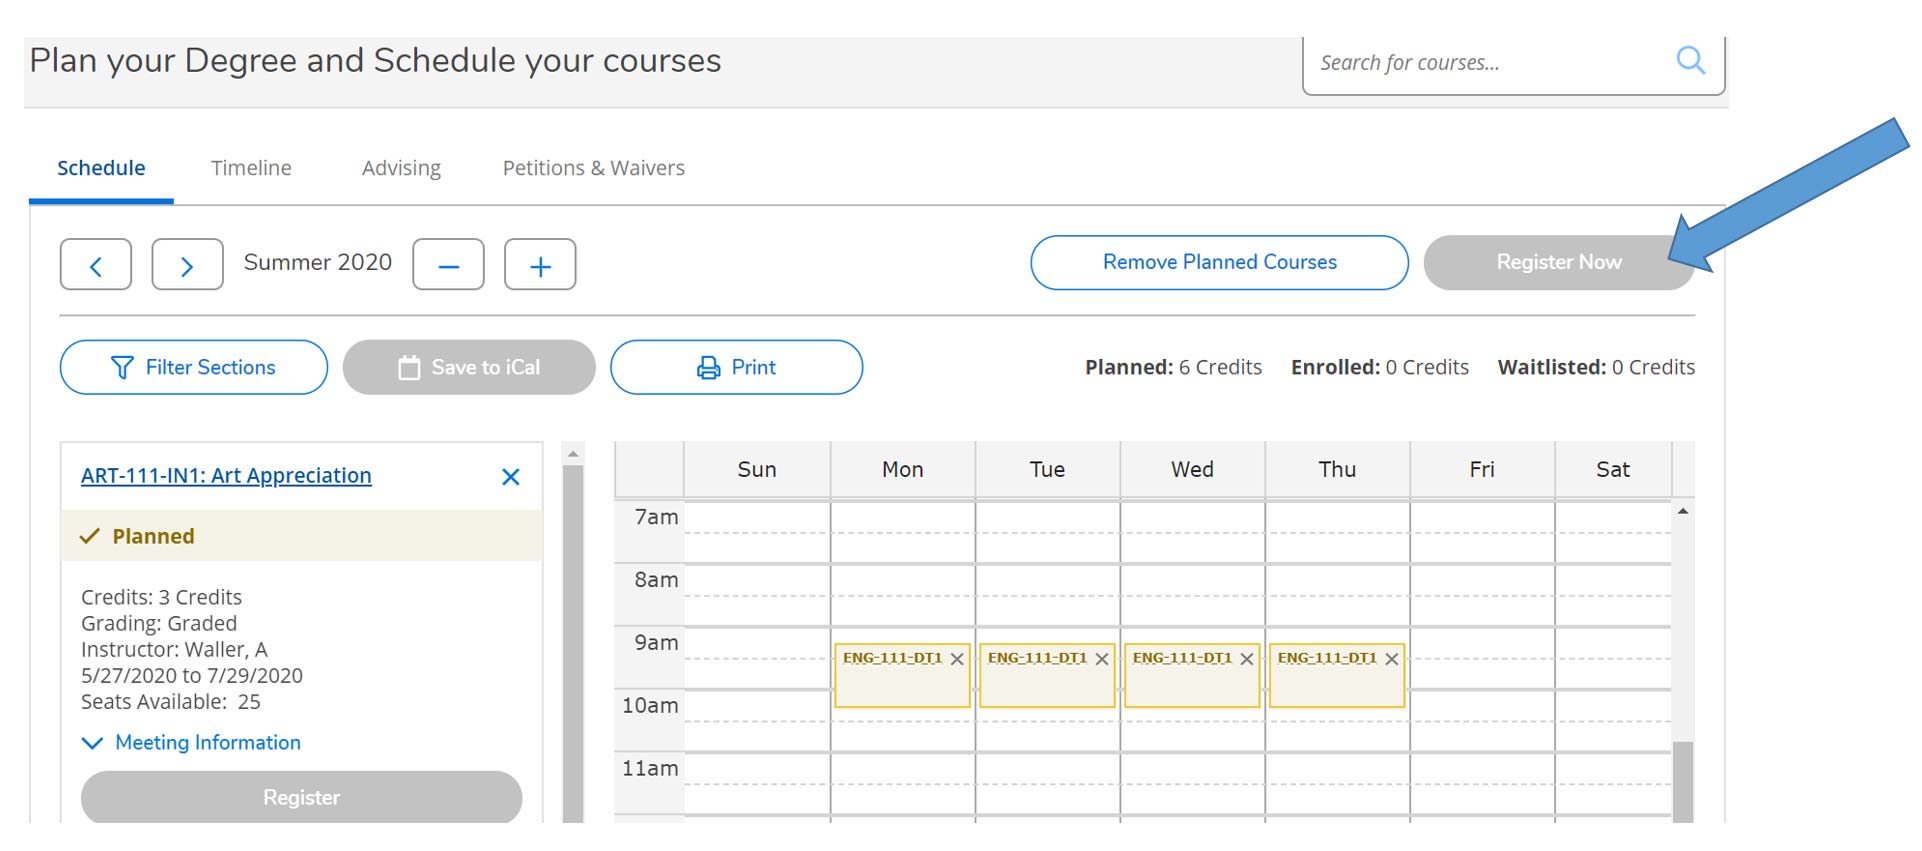
Step 17
When your schedule is complete, click the “Register Now” button in the top right corner. This box will turn BLUE and you will be able to click when registration is open. The yellow boxes will turn green when you have registered.
FINAL STEPS
If any of the sections remain yellow or have a red outline (meaning there are no seats available), you will need to click the circled X in that box and find another section. Make sure each section you try to register for has available seats and is not full.
Any notifications about registration holds, business office holds, parking fines, or prerequisite issues will pop up in the top right corner of the screen. If this happens you will need to contact your advisor.